Off-boarding employees in Office 365 (Part 2)
In part 2 of this blog, we will answer the questions we proposed in part 1, illustrating some techniques used to perform tasks associated with off-boarding employees in Office 365.
For this scenario we have started the off-boarding process by changing the password for the terminated employee’s Active Directory and Office 365 user accounts, giving the administrator the ability to login as the user to perform some of the tasks.
If the user’s email only needs to be forwarded to a single user within the organization, this can be done via the O365 Exchange admin center.
Open the user’s Exchange account and select mailbox features -> Mail Flow -> View details.
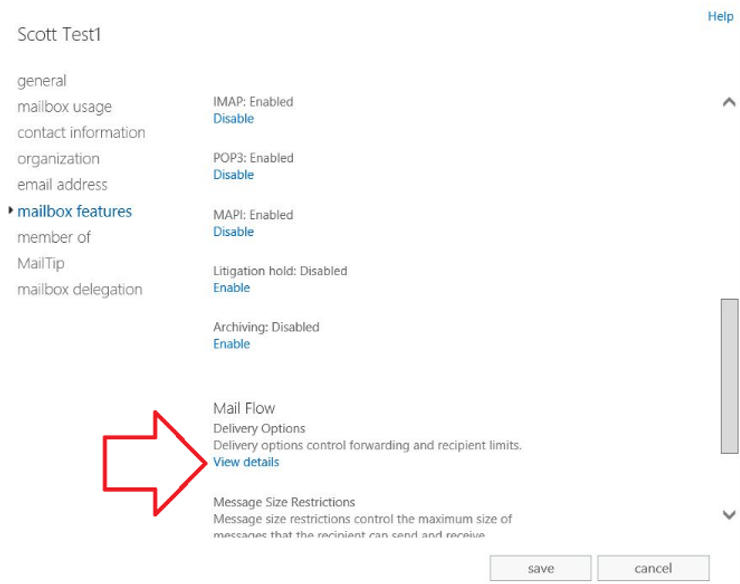
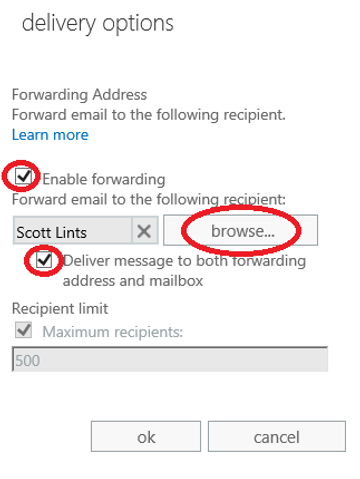
Then check the box for Enable forwarding and browse for the account to have the emails forwarded to. If you want all emails to be delivered to both mailboxes, check the box under the recipient, Deliver message to both forwarding address and mailbox.
Alternatively, you could log into the user’s OWA and create a new Mail Flow rule to forward all email to multiple addresses.
Note that this mail flow rule does not have an expiration date. It is assumed in this example that after the 60 day forwarding period, the user’s account will be disabled.
b. For how long (duration)? 60 days
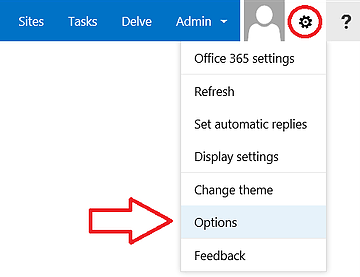
For this request, we will log into the user’s OWA and create an Automatic Reply. Once we have logged into OWA, click on the Settings cog wheel from the top right of the page and select Options.
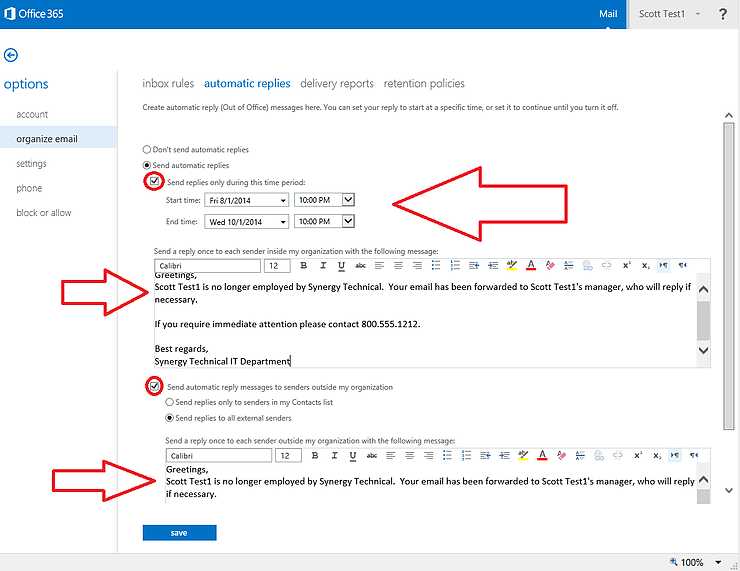
Then select organize email -> automatic replies. Click on the radio button, Send automatic replies and choose a date range if necessary. Copy and paste your text for the reply into the message area. If you wish for the automatic replies to also be sent to senders outside of your organization, continue down the page and check the box, Send automatic reply messages to senders outside my organization. This allows you to customize the auto replies for inside and outside senders. When you are finished, click Save.
a. For how long (duration of hold)? 7 Years
To accomplish this requirement, we will need to place the user’s mailbox on an In-place hold. Note that the user needs one of the following licenses assigned: E3; Exchange Online Plan 2; Exchange Online Archiving. Additionally, the administrator performing these tasks needs to have the appropriate permissions assigned to their O365 account (Discovery Management role group). Once these requirements have been fulfilled, navigate to the compliance management section of the Exchange admin center. Select the in-place eDiscovery & hold heading and click on the + to add a new in-place hold.
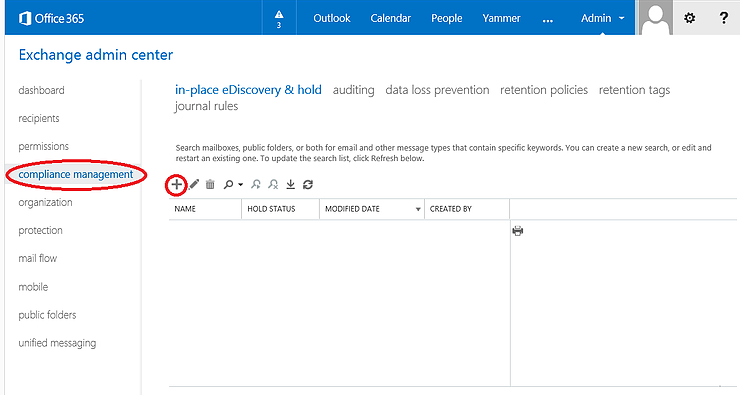
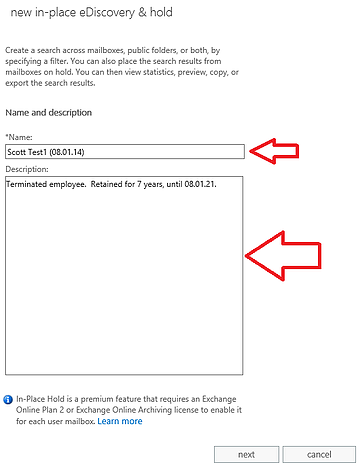
Give the hold a name and description and click next.
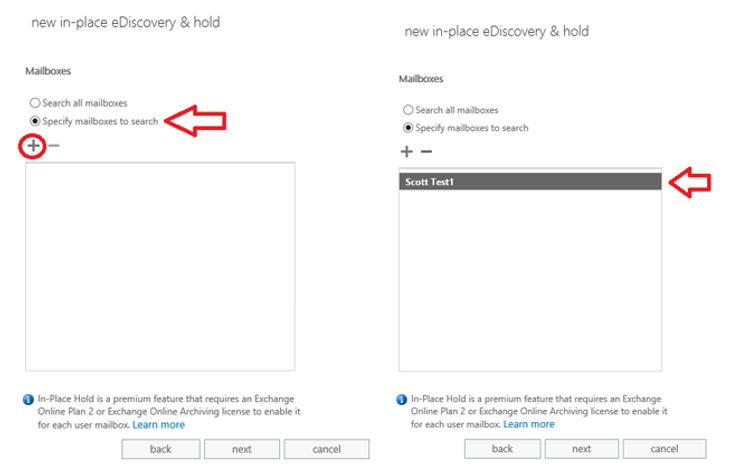
In the following window specify the mailbox to be searched. Once you have selected the user’s mailbox, click next.
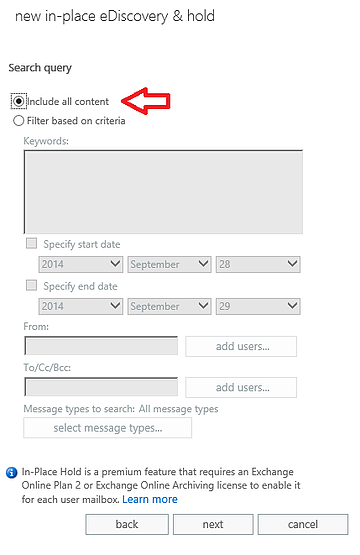
If you want to place the entire mailbox on hold, select include all content in the following window.
On the next and final window, you can choose to keep the mailbox on hold indefinitely or for a specified period of time (set with number of days).
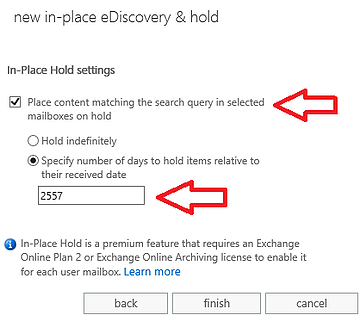
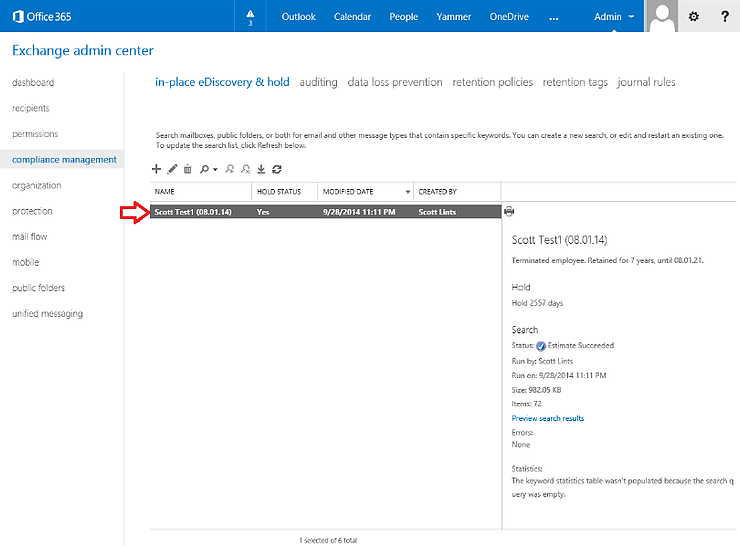
After you have completed these steps, you will see the details of the in-place hold from the main in-place hold eDiscovery & hold window. The user’s mailbox can now be downloaded as a .pst file or the results can be copied to a discovery mailbox that others can be given access to view.
a. Should the mailbox be mapped to Outlook or is OWA access sufficient? 7 Years
slints@syntechva.com - Not Mapped
scotttest2@syntechva.com - Mapped
To control the mapping of the mailbox in Outlook, this task is best done with PowerShell. Here are the PowerShell commands:

5. Should the user’s smartphone/tablet be wiped? Yes (corporate owned)
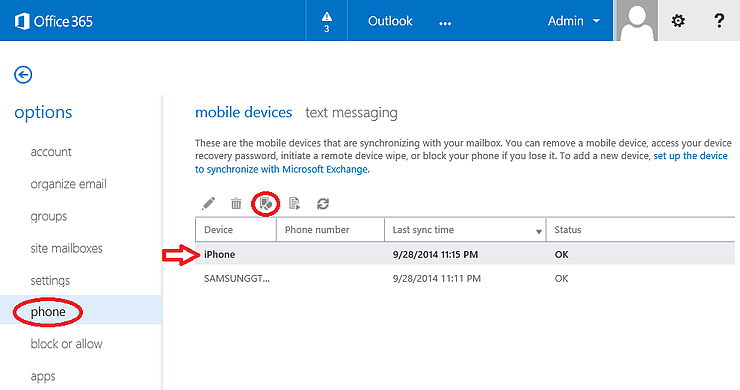
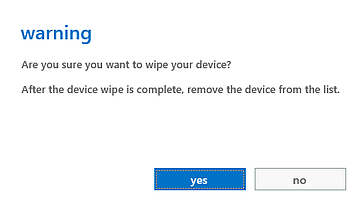
Note that this type of wipe, is a FULL WIPE of the smartphone, not just the email account. All pictures, text messages, etc. will be removed. This task can be accomplished while logged into the user’s OWA or from the Exchange admin center. From the user’s OWA, click on the Settings cog wheel from the top right of the page and select Options. Then select phone. On the mobile devices tab you will see the phones/tablets that are synchronizing with the user’s Office 365 account. Select the device you wish to wipe and the click on the wipe icon and select yes when prompted.
c. What to do with data afterwards (archive or delete)? Delete
To change the access settings for a user’s OneDrive for Business, navigate to the SharePoint admin center in Office 365. Click on the user profiles selection then under People select Manage User Profiles.
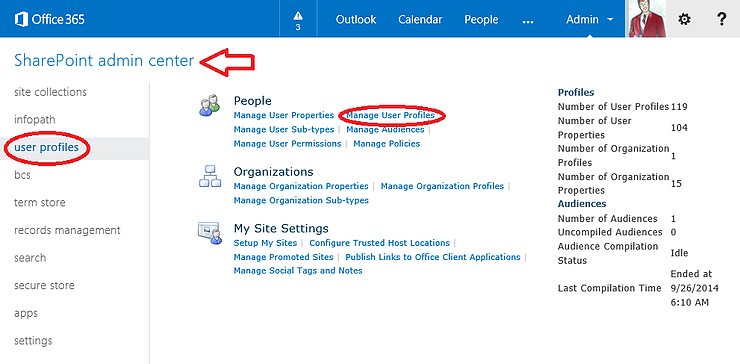
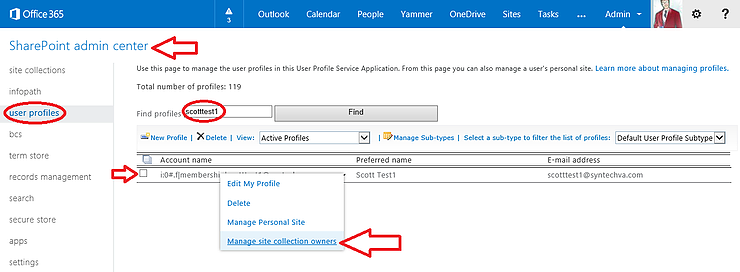
Next search for the user’s account. When the user’s account has been returned in the search, click on the dropdown for the account and select Manage site collection owners.
Add the desired user account(s) to the Site Collection Administrators group.
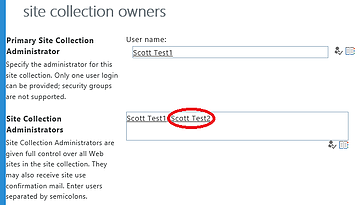
The newly added Site Collection Administrators can now access the user’s OneDrive at the following link: https://syntechva.com-my.sharepoint.com/personal/scotttest1_syntechva_com/Documents/Forms/All.aspx
If you have an on premise environment, when you remove a synced user account or place them in a non-synced OU then run a synchronization using DirSync, Office 365 will automatically send an email to the user’s manager notifying them that they have been given access to the user’s OneDrive for Business to save the documents before they are automatically deleted. The manager value is specified in the user’s AD account (Manager Attribute on the Organization tab).
Here is an example of the email sent from SharePoint Online:

7. Do the user’s Lync conversations need to be retained? Yes
By default all Lync conversations are saved to the user’s mailbox folder, “Conversation History.” These will be accessible via OWA for the users that have been given delegated access to the mailbox and via the in-place hold applied to the mailbox.
Would you like to find out more about Office 365? Learn how you can transform the way you work with Office 365 today.


Comments